62.6.3.4 Manage legacy resources
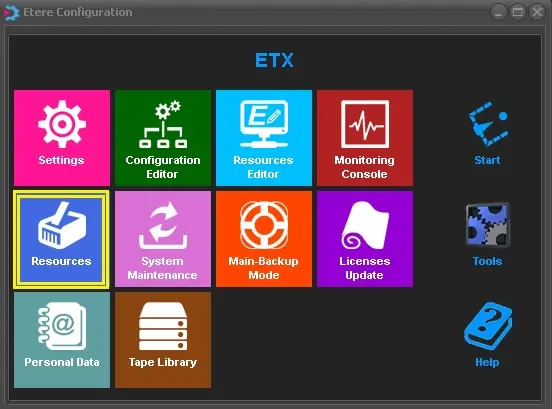
Legacy resources (i.e.: devices that Etere manages using a legacy configuration method) are configured in the Resources module. The Resources module is available from the Etere Configuration main menu:
Resources_module
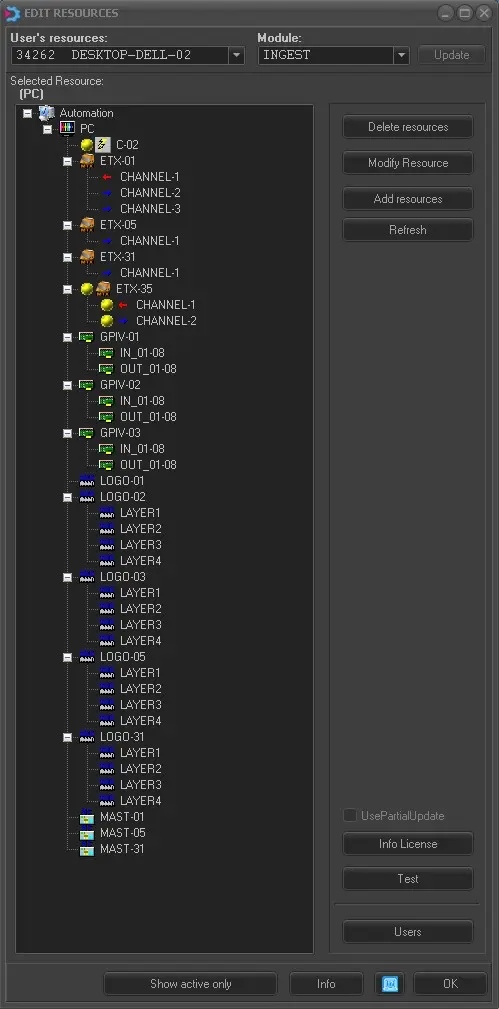
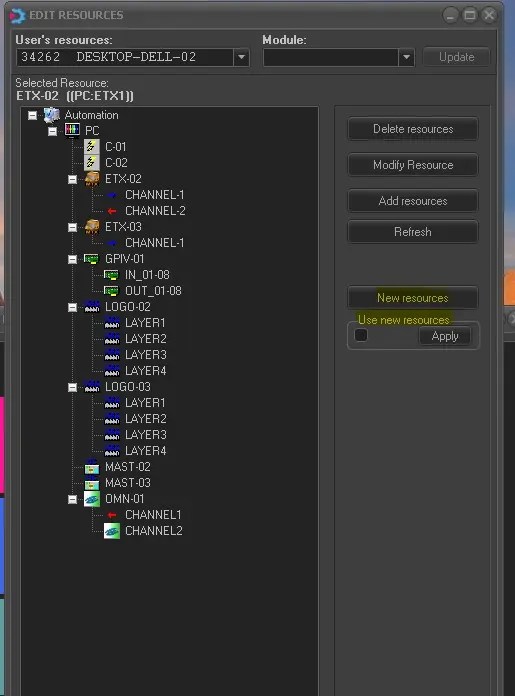
Once launched, the Resource's main window will be displayed, being its main user-interface composed by the following areas:
user_resources
User's Resources and Module - Select the Etere PC and Etere module (e.g. Ingest, Automation, Scheduling, etc) for which resources will be managed, this, for highlighting all those devices present in the resource tree which are currently enabled for.
Additionally, it is possible to use the [Show active only] button to filter in the resources tree only those resources enabled for the currently selected user's resource and module.
Resource Tree - Here will be listed all resources configured within the Etere system, enabled resources will show a yellow balloon which indicates that they are allowed to be used by the current selected User's resource and module.
NB: From Etere released version 29.2 if there is no correspondence between logged in user and resource path in SQL database, the local resource path would be read to establish the resources.
Legacy resources can be easily created, configured and assigned to the related Etere module by following the steps described below:
1. Create the Resource
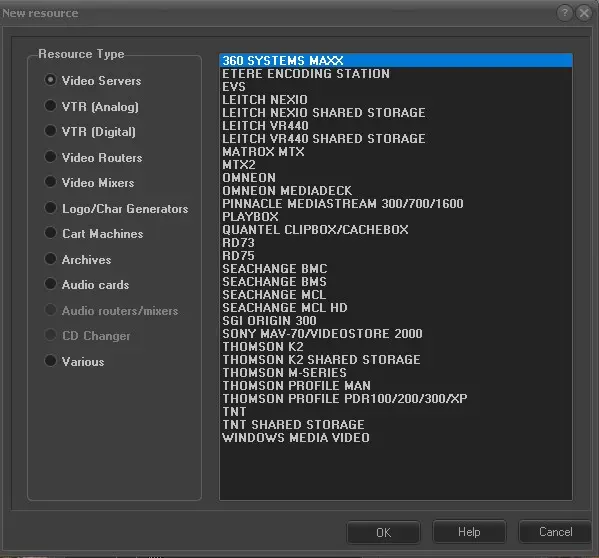
Click on the [Add Resource] button and select the Resource Type and the exact model,
Add_Resource
2. Configure the Resource
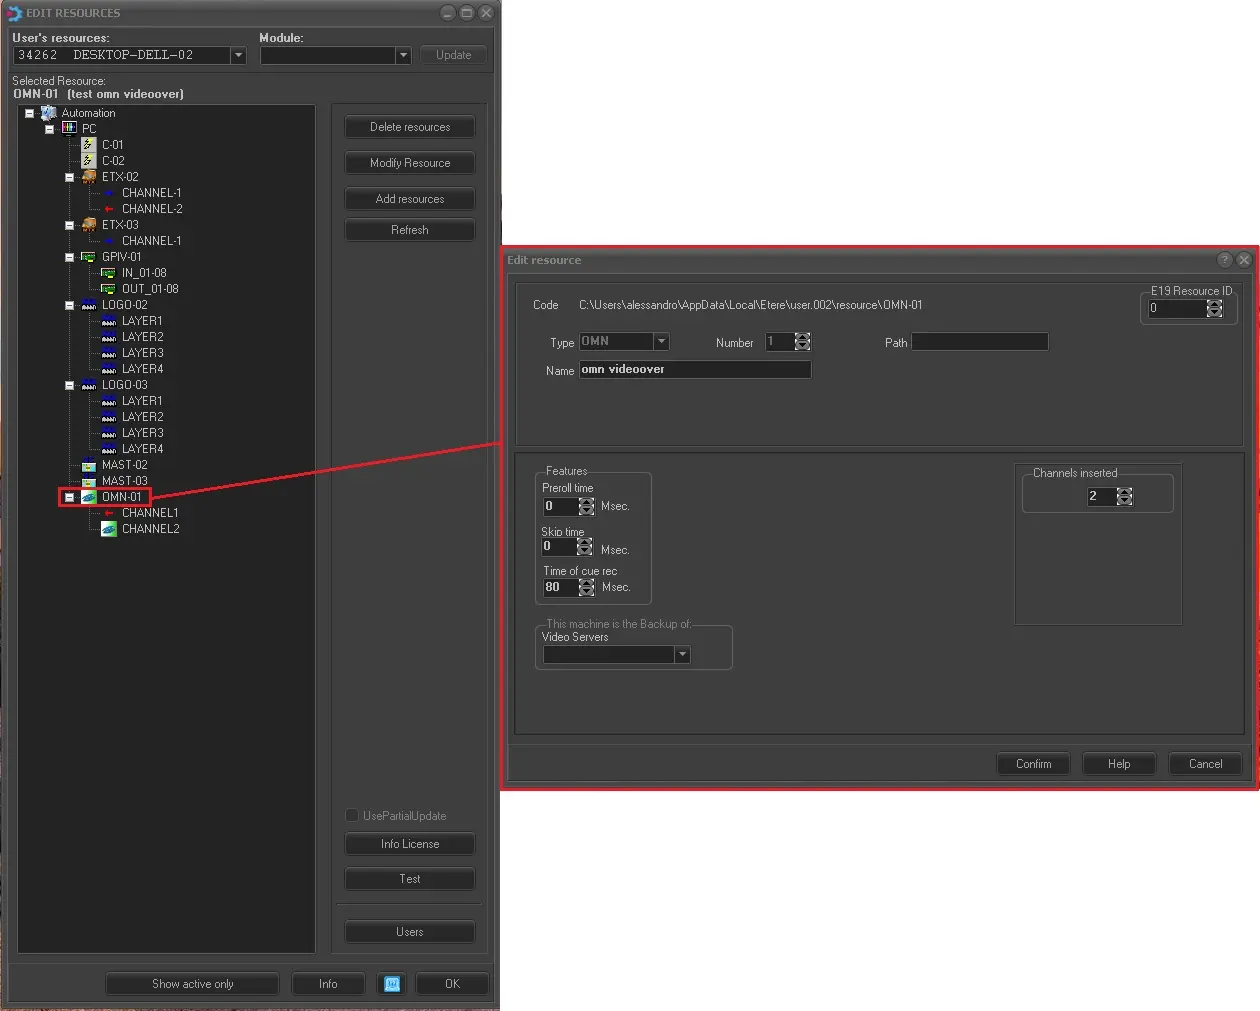
Once created, the 'Edit Resource' form will be displayed to set its parameters; this form can be opened at any time by selecting the resource from the resources tree and pressing the [Modify Resource].
Parameters required by the 'Edit Resource' form changes from one resource to another, therefore, for detailed information on how to compile them please refer to the related section of the Supported devices chapter. Special parameters are explained below:
Edit_Resource
E19 Resource ID - This parameter, located in the top right part of the window, it's the ID of the related resource created under the Resources Editor module. This ID is used to, for example, monitor the storage space usage of the resource.
Path - This parameter, available only for video servers, allows configuring the path used by "Etere Ingest > Delete" to delete files without using the resource video channels.
NB: In case the resource is a multi-channel video server, each one of its in/out channels must be configured as explained before.
3. Enable the Resources
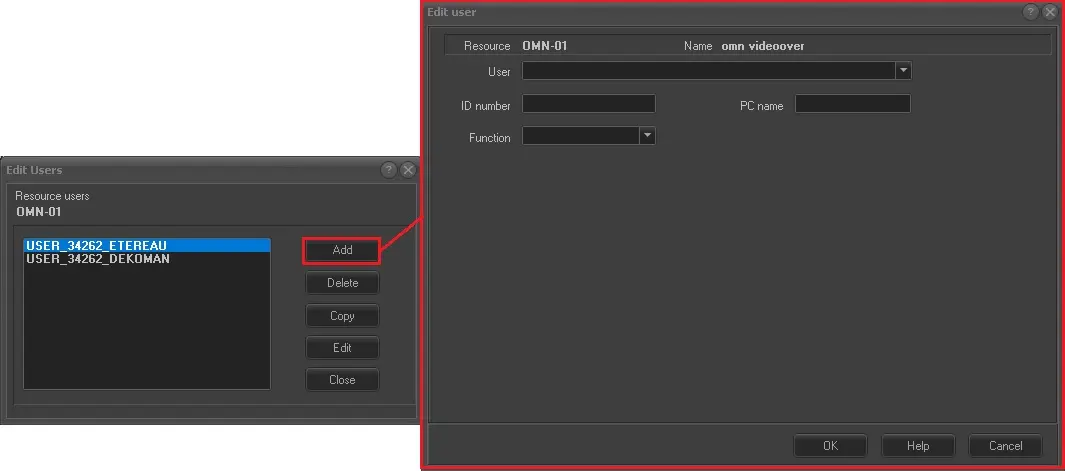
Selecting the legacy resource and pressing the [Users] button, the 'Edit Users' form will be opened, allowing to enable the resources to be used according to the following criteria:
Edit_Users
• User: Specify the specific workstation for which the resource will be allowed. Once selected, it will be automatically retrieved and displayed the ID number and PC name corresponding to the selected PC.
• Function: Indicate the module on which the above mentioned user is allowed to use the resource in question. Available functions includes:
Assetform (Media Library) - Resource to be used by Media Library module for censorship.
Automation - Resource to be used by Automation for master playout.
Automation clone - Resource to be used by Automation for clone playout.
Cartwall - Resource to be used by the Cartwall module for quick playout.
Commercials - Resource to be used by Air Sales for preview of commercial events.
Ingest - Resource to be used by the Ingest or MAM module.
Media manager (Data Mover) - Resource to be used by the Data Mover module.
Music manager - Resource to be used by the Music Format module.
News browser - Resource to be used by the MOS Gateway module.
News filler - Resource to be used by the MOS Gateway module.
News playout - Resource to be used by the MOS Gateway module.
Object reel - Resource to be used by the Object Reel module for media archive.
Preview - For Hi/Low-res preview, for Video Assist playout, etc.
Scheduling - Resource to be used by Scheduling for hires preview.
Split (Ad Insertion) - Resource to be used byAd Insertion for playout.
STMan - Resource to be used by STMan for graphics overlay.
• Others: Please note that other parameters required by the 'Edit Users' form changes from one resource to another, therefore, for detailed information on how to compile them please refer to the related section of the Supported devices chapter:
NB: In case the resource is a multi-channel video server, each one of its in/out channels must be enabled as in this section.
4. View the Resource
At this point, when the legacy resource has been successfully created, configured and assigned, it's now ready to be used by Etere.
Moreover, making right-click on a certain resource will give access to a set of useful functions including:
• Device test - Open the test form for attempt connecting and controlling the resource.
• Connection test - Test the connectivity and function of the resource by simulating a real action (e.g. play on video server, take on logo generator, etc).
• Delete - Deletes the selected resource from the db. This operation can be done with the [Delete resources] button as well.
• Edit - Allow to edit the selected resource. It's the same operation described above using the button [Modify Resource].
• Add - Allow to add a new resource. It's the same operation described above using the button [Add Resources].
• User - Allow to assign the resource. It's the same operation described above using the button [Users].
• Properties - This function display the details properties of the selected resource. The properties are read in the related .ini file, located in the path specified at the "Inifile" row of the properties.
• SNMP Test - It allows you to view SNMP messages including Warning, info and Error messages.
• User replacement - Allows to change the ID of a user across all resources. This function is useful, for example, when reinstalling a workstation (with a new ID).
• Set the device as "tested" - Puts a Res_Test_A (green balloon) on the resource to indicate that its functioning has been tested.
• Set the device as "to test" - Puts a Res_Test_B (yellow balloon) on the resource to indicate that its functioning has not been tested yet.
• Change codecs - Replace the codec associated to the selected resource with another one given by the user.
• Change ID - Manually modify the ID of the resource.
• Update in SQL - Saves into the database all changes performed to the device.ini file. Please refer to the section below for information on how to edit said file.
• View Logs - Select this option to view the details message capturing how the resources was managed during modification.
----------------------------------------------------- Parte non presente nell'help clienti ----------------------------------------------------
Importing legacy resources
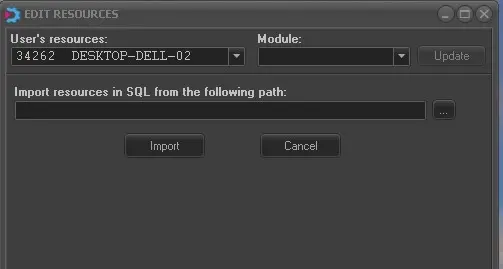
Once created, legacy resources can be copied from one station to another (e.g. from channel 1 to channel 3) through a simple import interface. In order to access this sensitive function (all previously existing resources will be deleted during the import) simply follow the steps described below:
Importing_legacy_resources
1. Use the Ctrl +Alt +Shift + I keys combination to access the import function:
2. Select the folder path (e.g. c:\users\michael.etere\appdata\local\etere\user.001\resource\) containing the resources to be copied.
3. Press the
Hidden functions
Other sensitive functions which are not visible from the interface includes the following ones:
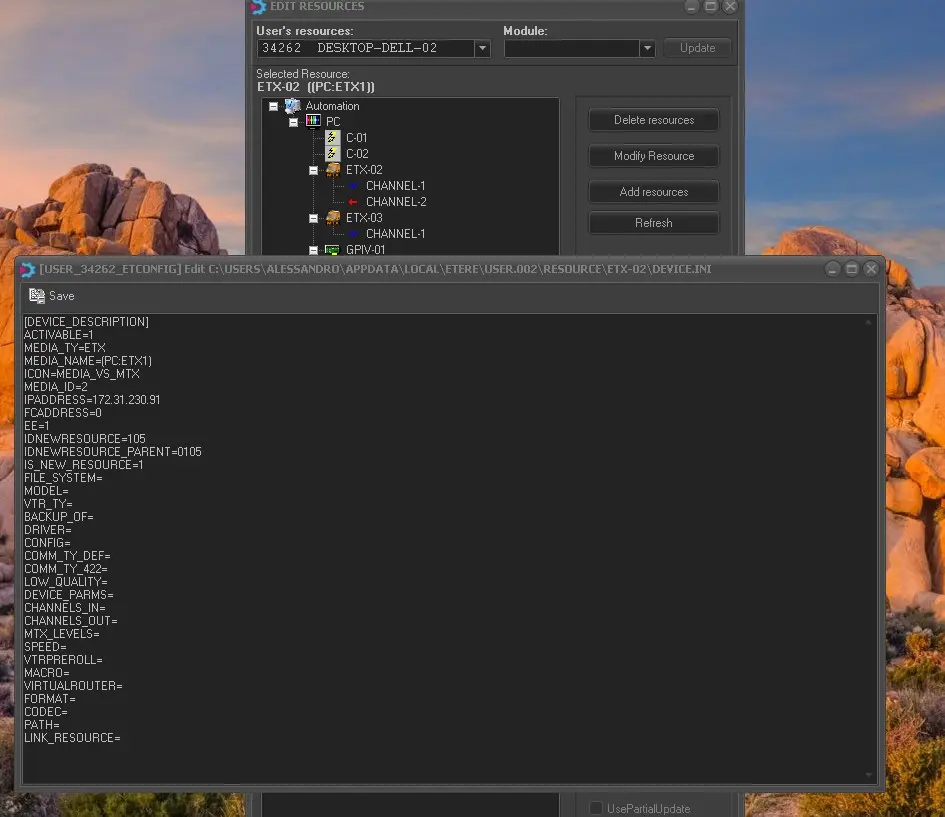
Ctrl + Alt + Shift + A - Manually edit the device.ini file of the selected resource (e.g. to modify its "media_ty" property):
[DEVICE_DESCRIPTION]
ACTIVABLE=1
IPADDRESS=eteremtx2
FCADDRESS=18000
ICON=MEDIA_VS_MTX
MEDIA_NAME=MTX2
MEDIA_TY=MTX
MEDIA_ID=2
FILE_SYSTEM=
MODEL=
DRIVER=
...
manually_edit_device_ini